
HEAT HERO GRAVITY INSTALLATION GUIDE
🛡️Warranty
Heat Hero products are covered by a 5-year warranty; all other supplied components are covered by a 1-year warranty.
System Diagram
Installation Instructions
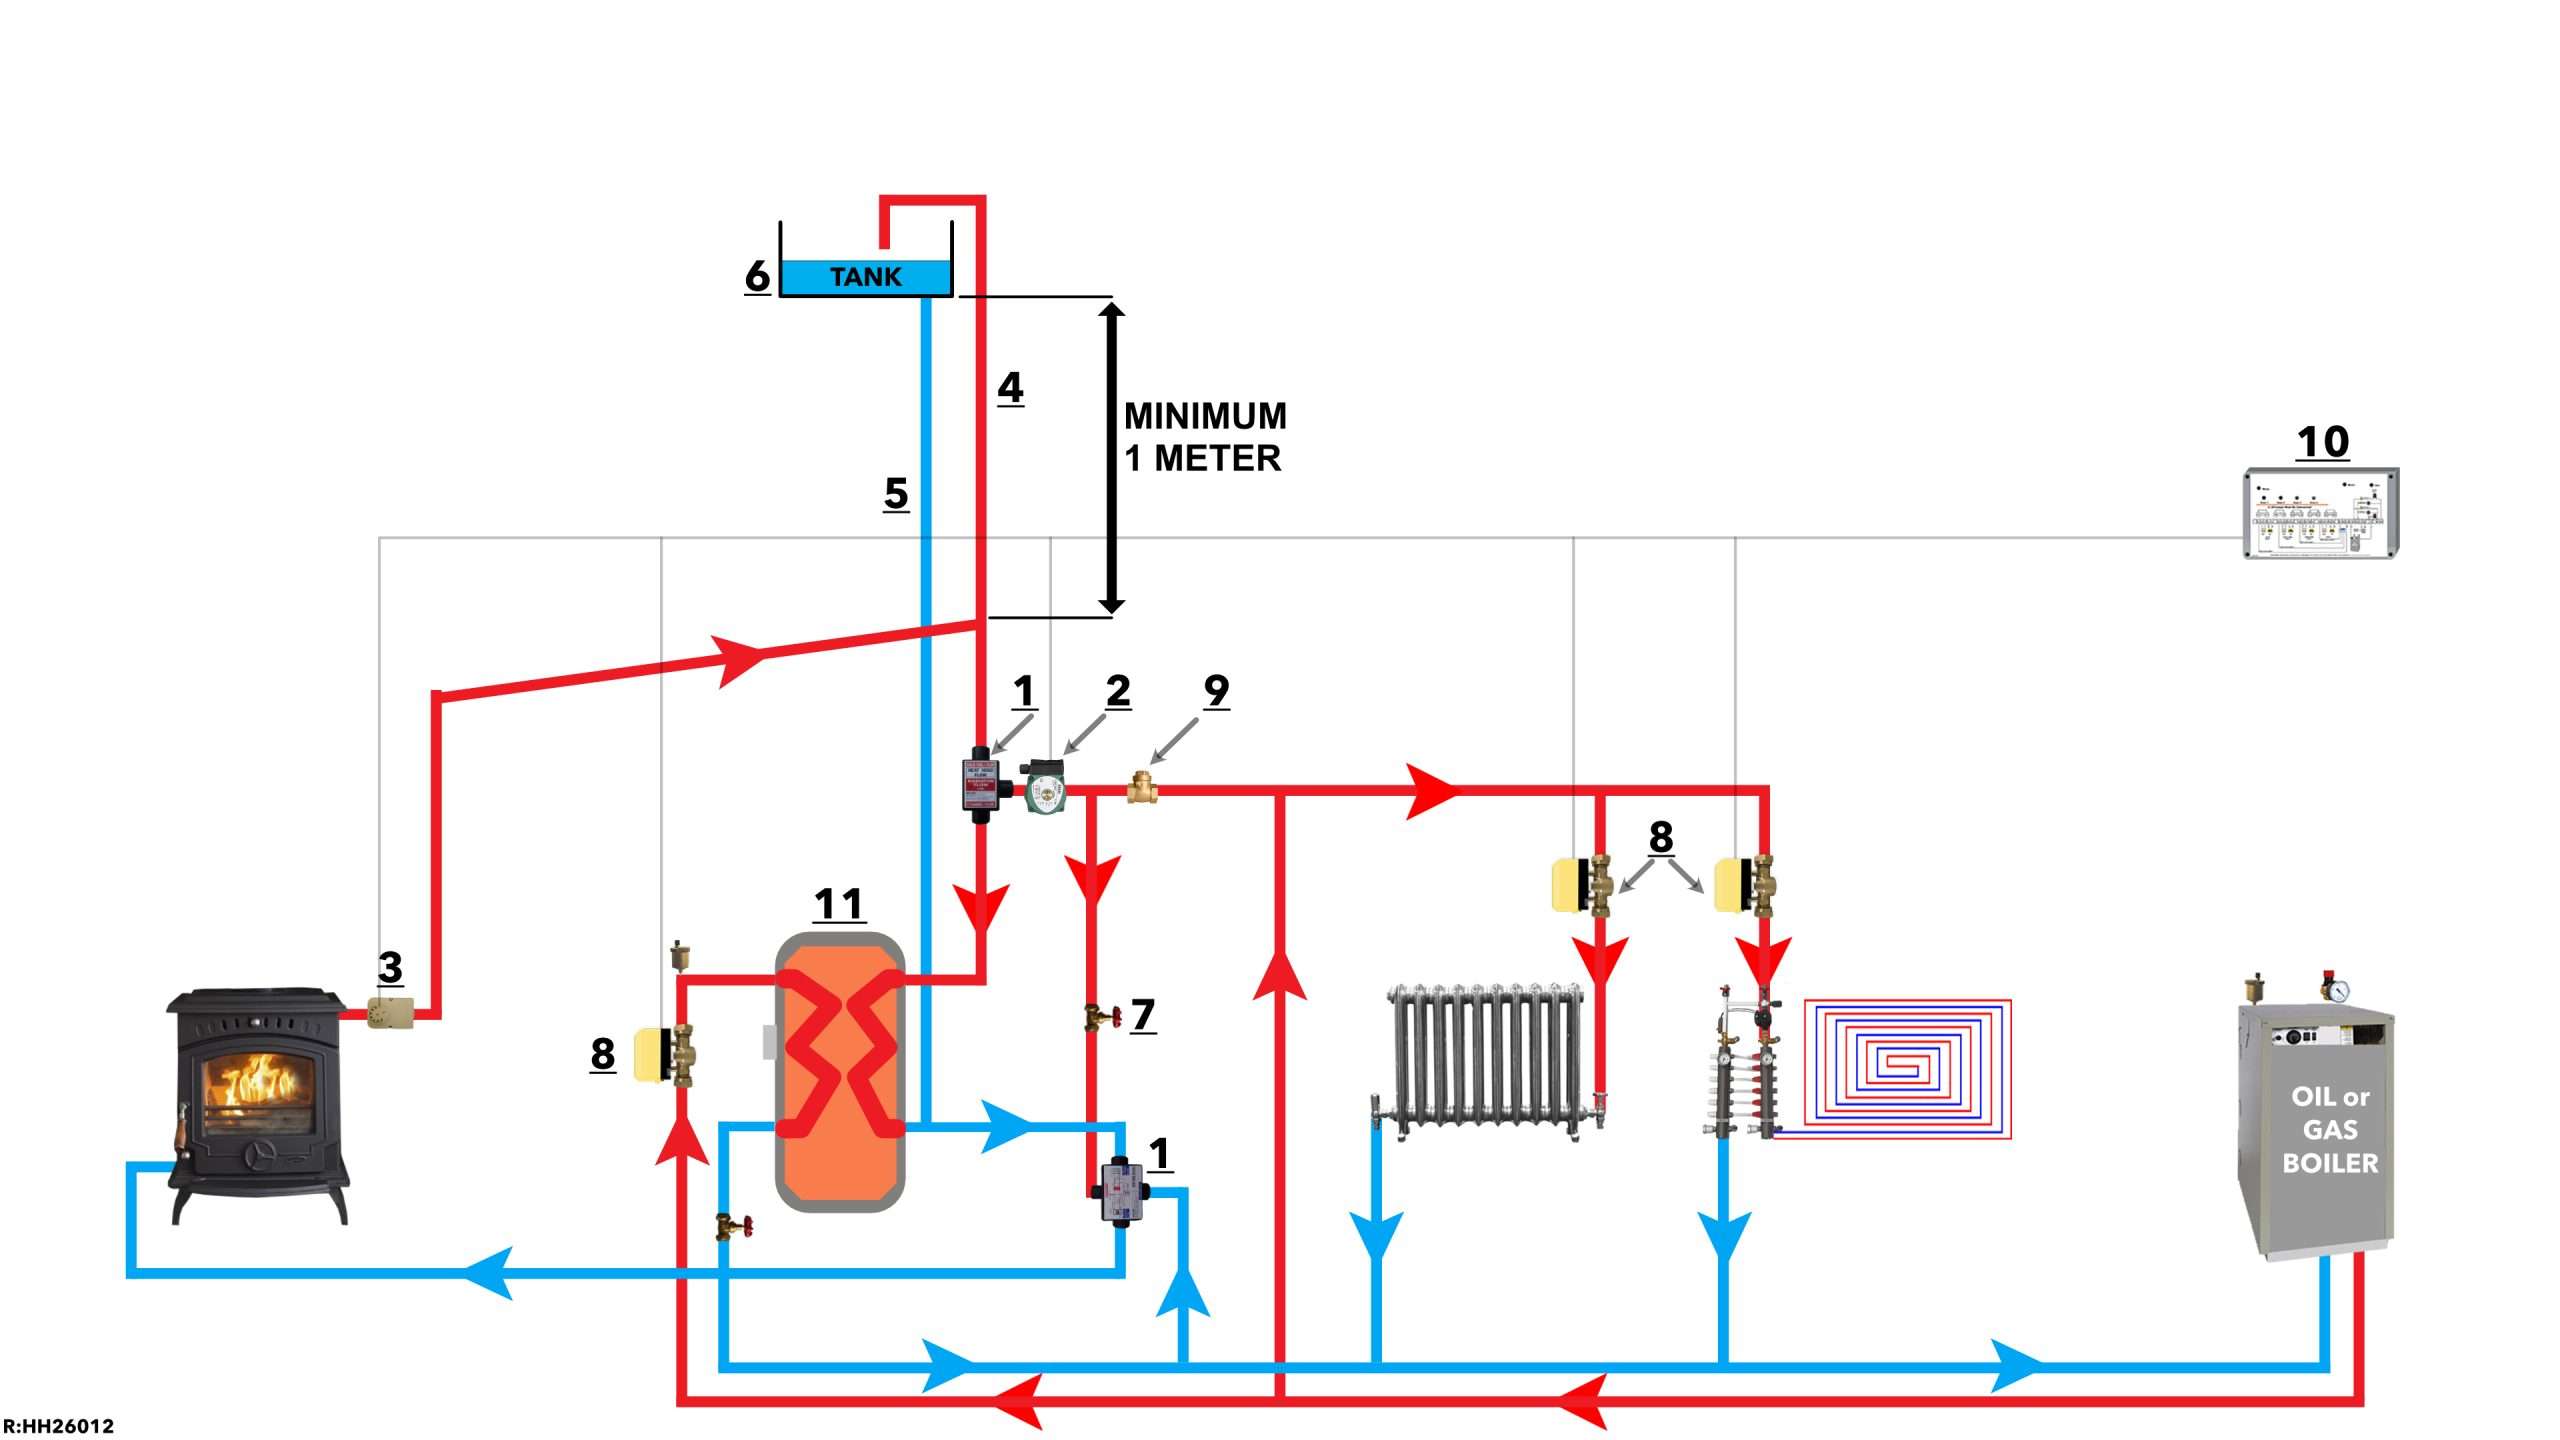
| 1. Flow and Return Manifold | Can be rotated in any direction and installed at any point on the gravity pipes. |
| 2. Circulation Pump | Use an 8-metre pump for more efficiency, hotter radiators and hotter water. |
| 3. Pipe Thermostat | Set to 55°C and fit close to the solid-fuel boiler. |
| 4. Expansion Pipe | Minimum ¾”, installed at the highest point of the gravity flow. |
| 5. Cold Feed | Must be connected to the gravity return. |
| 6. Heating Storage Tank | Minimum 1 meter above the highest point of the heating system. |
| 7. Injector Flow | Connect to the return manifold and set the balancing valve to ¼ open. |
| 8. Heating Zones | At least one radiator zone must be open when the solid-fuel circulation pump is running. |
| 9. Non-Return Valve | Use a flap-type gravity non-return valve, not a spring-type valve. |
| 10. Wiring Centre | Can be used for multiple zone control. |
| 11. Cylinder | A single coil cylinder can be used. Contact Heat Hero for details. |
Gravity Installation Video
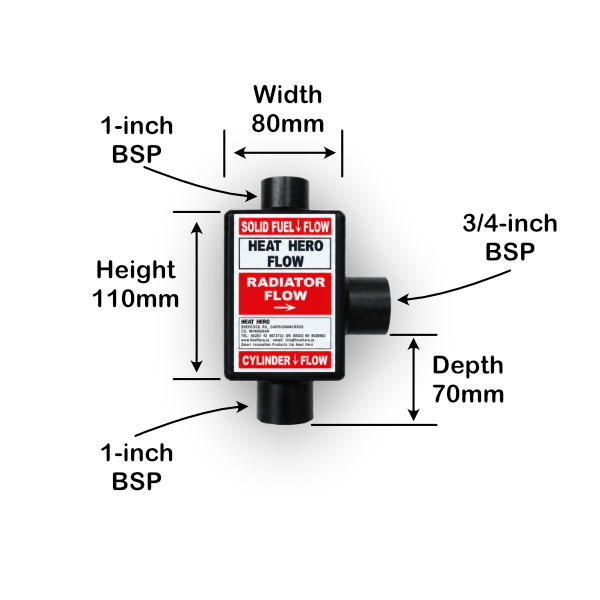
Flow Unit Dimensions
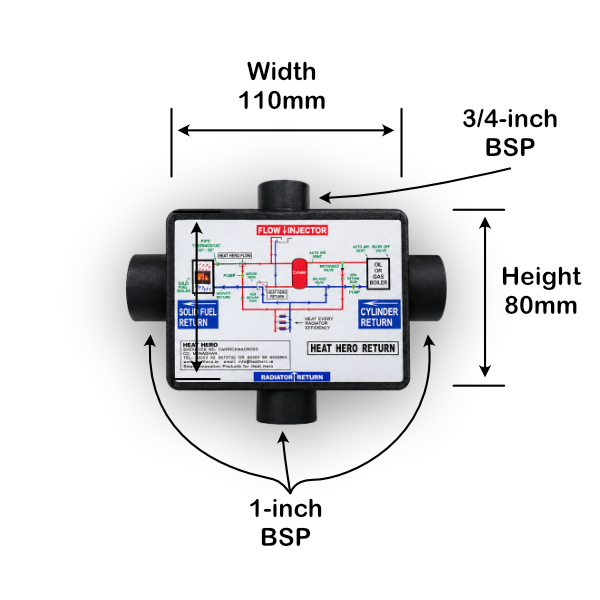
Return Unit Dimensions
Call Art for advice or information.
Four Zone Wiring Center available.